camp. (It was one of my favorite parts of going to camp!) While I was there, I
learned how to do scratch art and how to make colorful drawings with it. I drew
pictures of people, flowers, animals, and places I wanted to see. What is
scratch art? How do you do scratch art? How can you use it in the classroom? Keep
reading to learn the answers to these questions!
What is scratch art?
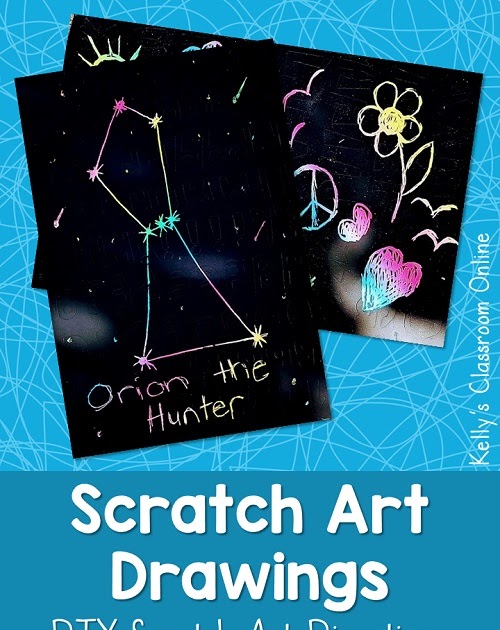
Scratch art (also known as engraving art) is an art technique in which you
use a wooden stylus to etch or ‘scratch’ images out of black ink. You can integrate scratch
art into a wide variety of activities, including language arts and science.
For example, you can use scratch art to draw nocturnal animals or
constellations during science class. You can also use scratch art to draw
characters, settings, and events from the books children read during
ELA.
.jpg "Scratch Art 01")
Materials Needed to Make a Scratch Art Picture
Minimal materials are needed to do scratch art and can be purchased
inexpensively at a dollar store. Links to purchase these items in bulk are
included below.
Required materials:
Optional materials:
.jpg "Scratch Art 02")
How to Make a Scratch Art Picture
1. Take a sheet of white paper and use your crayons or colored
pencils to draw colorful designs and patterns on it. The harder you press
with your crayons or colored pencils, the brighter your finished pictures
will be. Be sure to fill in all of the white spaces.
2. Use a
black crayon to cover your entire page of designs. Again, press down as
hard as you can with the black crayon and try to cover everything.
If you don’t want to use a black crayon, you can use black paint instead.
Simply mix a bit of black paint and dish soap together in a mixing bowl.
Then cover the entire paper with paint. (Exact amounts of soap aren’t necessary… just a small squirt into the paint will do.) The dish soap will help the paint
stick to the crayon.
.jpg "Scratch Art 03")
3. Use a toothpick or wooden stylus to
draw a picture. When you scratch through the black layer, you’ll be able
to see the bottom layer of colors peek through. See what happens when you
apply pressure to your stylus while drawing. Then see what happens when
you apply light pressure. What kind of textures and other effects can you make? Be careful to avoid pressing too hard though… too much pressure can tear the paper.
4. When you are finished with your picture, crop the edges as needed. Then
mount your picture onto colored paper and hang it up for people to see!

Did you enjoy this post about making scratch art drawings? If so, check out
these other blog posts for more arts-n-crafts ideas:
search words: scratch art, engraving, engrave, art, draw, drawing, illustrations


